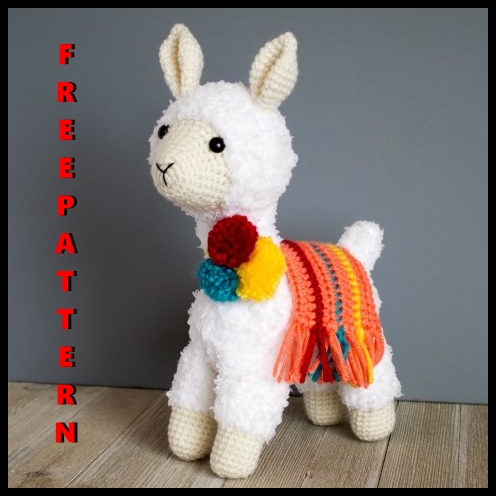
Amigurumi Cute Llama Free Pattern
Hello dear visitors, I am here again with new amigurumi molds for you. I am sharing amigurumi patterns for you here for free. You can make your children happy by making these patterns. Amigurumi toys are very popular lately and are the most beautiful toys that don’t harm your kids. Your kids will love them. Let’s move on to our pattern and give them this gift.
Abbreviations
SC– single crochet
SC INC– single crochet increase (2 SC in each stitch)
INV DEC– Invisible decrease (put hook through the FRONT LOOP ONLY of two consecutive stitches [two loops on hook] Yarn over pull through both loops. [two loops on hook] Yarn over pull through two loops)
Magic Circle– Make a loop, leaving a long tail to work with. Insert hook in center of loop, yarn over and draw up a loop. Yarn over, pull through to make the first chain (this does not count as a stitch!). Continue to crochet over the loop and tail with the number of stitches called for. (If you need 6 SC, then crochet 6 SC inside the ring.) Pull the tail to close the circle.
Always move your stitch marker to the last stitch in the round. This pattern is worked in continuous rounds.

Head
Using the worsted weight yarn:
Round 1: In a magic circle, 6 SC.
Round 2: SC INC in each around. (12)
Round 3: SC in first, SC INC in next. Repeat around. (18)
Rounds 4-5: SC in each around (18)
Round 6: SC in first 2, SC INC in next. Repeat around. (24)
Round 7-8: SC in each around. (24)
Round 9: SC in first 3, SC INC in next. Repeat around. (30)
Round 10: SC in each stitch around. (30)
Round 11: SC in first 4, SC INC in next. Repeat around. (36)
Change to Pipsqueak yarn.
Round 12: SC in first 5, SC INC in next. Repeat around. (42)
Round 13-18: SC in each around. (42)
Sew the nose and attach the eyes here. The eyes I attached between the rows 10 and 11, about 7 stitches apart. Double check that they are the same height before you attach the backs.
Round 19: SC in the first 5, INV DEC in the next. Repeat around. (36)
Round 20: SC in the first 4, INV DEC in the next. Repeat around. (30)
Round 21: SC in the first 3, INV DEC in the next. Repeat around. (24)
Round 22: SC in the first 2, INV DEC in the next. Repeat around. (18)
Round 23: SC in the first, INV DEC in the next. Repeat around. (12)
Round 24: INV DEC around. (6)
Fasten off and carefully sew the remaining hole closed.
Ears (make two)
Round 1: In a magic circle, 6 SC.
Round 2: SC in each around. (6)
Round 3: SC INC in each around. (12)
Round 4: SC in first, SC INC in next. Repeat around. (18)
Round 5: SC in the first 2, SC INC in next. Repeat around. (24)
Rounds 6-8: SC in each around. (24)
Round 9: SC in first 2, INV DEC in next. Repeat around. (18)
Round 10: SC in first, INV DEC in next. Repeat around. (12)
Round 11: SC in each around.
Fasten off, leaving a tail to sew on the head. Pinch the bottom of the ear to make a little crease and sew a few stitches to hold the shape. I attached the ears 4 rows back from where the white fluffy yarn starts about level with the eyes.
Body (this part is just a tube.)
Using the Pipsqueak yarn:
Round 1: In a magic circle, 6 SC.
Round 2: SC INC in each around. (12)
Round 3: SC in first, SC INC in next. Repeat around. (18)
Round 4: SC in first 2, SC INC in next. Repeat around. (24)
Round 5: SC in first 3, SC INC in next. Repeat around. (30)
Round 6: SC in first 4, SC INC in next. Repeat around. (36)
Round 7: SC in first 5, SC INC in next. Repeat around. (42)
Rounds 8-17: SC in each around. (42)
Round 18: SC in the first 5, INV DEC in the next. Repeat around. (36)
Round 19: SC in each around. (36)
Round 20: SC in the first 4, INV DEC in the next. Repeat around. (30)
Round 21: SC in the first 3, INV DEC in the next. Repeat around. (24)
Round 22: SC in the first 2, INV DEC in the next. Repeat around. (18)
Round 23: Sc in the first, INV DEC in the next. Repeat around. (12)
Decrease in each around as you can and then sew the remaining hole together.
Neck
Chain 21. Attach to the first chain so you have a circle. Take care not to twist the chain when you connect it. Attach the stitch marker here. Crochet in each stitch around, for a total of 7 rows.
Pin this tube to the front of the body. Make sure it is centered, then attach the bottom by sewing around, multiple times if you need to. Stuff it very well and pin the head to the top. Sew the head on.
Legs (Make 4)
Starting with the worsted weight yarn
Round 1: In a magic circle, 6 SC.
Round 2: SC INC in each around (12)
Round 3: SC in first, SC INC in next. Repeat around. (18)
Rounds 4-10: SC in each around (18)
Change to the pipsqueak yarn.
Rounds 11-18: SC in each around. (18)
Fasten off and leave a long tail to sew onto the body. Stuff up to the worsted weight line but don’t stuff too much more than that.
When you attach the legs, use pins and a large needle. I pin the front legs first. I made sure the legs both lay flat on the table. If helpful, prop the back part of the body on something even with the legs. Attach the tops. Repeat with the back legs.
Tail
Round 1: In a magic circle, 6 SC.
Round 2: SC INC in each around. (12)
Round 3-7: SC in each around. (12)
Fasten off and leave a long tail to sew onto the body. I did not stuff my tail, just flattened it!
Neck Pom Poms
I made 3 pom poms using the smallest Clover pom maker (the pink one). Chain 35 and fasten off. Sew two pom poms on one end and one on the other. I just twisted the one around the two to fasten.
Blanket
Row 1: Chain 30 and turn. HDC in the second chain from the end.
Rows 2-3: HDC in each stitch across. (28)
Row 3: Change to an accent color. SC in each across. (28)
Rows 4-5: HDC in each stitch across. (28)
Row 6: Change to an accent color. SC in each across. (28)
Rows 7-8: HDC in each stitch across. (28)
Row 9: Change to an accent color. SC in each across. (28)
Rows 10-11: HDC in each stitch across. (28)
Cut 3 inch pieces for the fringe. Attach to the edge by folding the pieces in half and pulling through the edge of the blanket with your hook. Pull the two edges through the loop and pull tight.