Amigurumi Bunny Free Pattern
Hello dear visitors, I am here again with new amigurumi molds for you. I am sharing amigurumi patterns for you here for free. You can make your children happy by making these patterns. Amigurumi toys are very popular lately and are the most beautiful toys that don’t harm your kids. Your kids will love them. Let’s move on to our pattern and give them this gift.
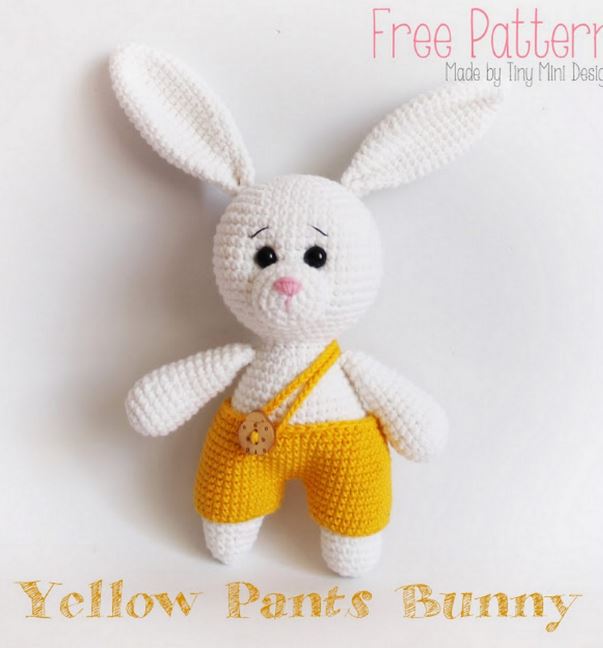
Pattern: Tiny Mini Design
Isn’t a bunny dressed in yellow pants so cute? Stay tuned on our website for many new amigurumi free patterns.
Sembols
sc = single crochet
dc = double crochet
inc = increase
dec = decrease
st(s) = stitch(es)
sl st = slip stitch
ch = chain
Bunny:
Head and Body:
Starting with white color
R1. Magic ring and 6 sc into it.
R2 . 6 inc (12)
R3. (1 sc ,1 inc) *6 (18)
R4. (2 sc ,1 inc)* 6 (24)
R5. (3 sc ,1 inc)* 6 (30)
R6. (4 sc ,1 inc)* 6 (36)
R7. (5 sc ,1 inc) *6 (42)
R8. (6 sc ,1 inc)* 6 (48)
R9 to 16. 48 sc
R17. (6 sc, 1 dec)*6 (42)
R18. (5 sc, 1 dec)*6 (36)
R19. (4 sc, 1 dec)*6 (30)
R20. (3 sc, 1 dec)*6 (24)
R21. (2 sc, 1 dec)*6 (18)
Continuing with body
R22. (2 sc ,1 inc)* 6 (24)
R23. (3 sc ,1 inc)* 6 (30)
R24. 30 sc
R25. (4 sc ,1 inc)* 6 (36)
R26 to 29. 36 sc
R30. (5 sc ,1 inc) *6 (42)
R31. 42 sc
R32. (6 sc ,1 inc)* 6 (48)
R33 to 34. 48 sc
Starting the bunny’s leg.
Each leg will be first 20 sc. Since we do no not cut the yarn. The first leg a continuation of knitting. The second will be connected separately from the first. Fort his purpose, counted from the hoohl back 20 loops and 20, in a colockwise direction starting to knit the leg. So knit:
R1 to 5. 20 sc
R6. 18 sc , 1 dec (19)
R7. 19 sc
R8. 17 sc, 1 dec (18)
R9. 18 sc
R10. 16 , 1 dec (17)
R11. 17 sc
R12. 2 sc, (1 sc, 1 dec)*5 times (12)
R13. 6 dec (6)
Fasten off.
To make he second leg, the first leg loops reckon 4 and on the basis of the first, the second knit. Between the feet have remained at 4 sc on each side. When the legs are ready,we fill the toy through the remaining hole, and take a big needle and yarn,which knitted,suture it.
Hand:
Starting with white color
R1. Magic ring and 6 sc into it.
R2 . 6 inc (12)
R3. (1 sc ,1 inc) *6 (18)
R4 to 6 18 sc
R7. (7 sc, 1 dec)*2 (16)
R8. 16 sc
R9. (6 sc,1 dec)*2 (14)
R10 to 14. 14 sc
Fill the hand. The upper part can not fill to the handle then not sticking out to the side.
R15. ( 5 sc, 1 dec)*2 (12)
R 16. 12 sc
R17. 6 dec (6)
Fasten off, , leaving a long yarn tail.
Ears:
Starting with white color
R1. Magic ring and 6 sc into it.
R2. (1 sc ,1 inc)*3 (9)
R3. (2 sc, 1 inc)*3 (12)
R4. 12 sc
R5. (1 sc, 1 inc)*6 (18)
R6. 18 sc
R7. (2 sc, 1 inc)*6 (24)
R8 to 15. 24 sc
R16. (4 sc, 1 dec)*4 (20)
R17. 20 sc
R18.(1 sc, 1 dec)*4 (16)
R19. 16 sc
R20. (2 sc, 1 dec)*4 (12)
R21 to 23. 12 sc
Fasten off, , leaving a long yarn tail. Fold ears in half,sew the ears to the head.
Muzzle:
Starting with white color
R1. Magic ring and 6 sc into it.
R2 . 6 inc (12)
R3. (1 sc ,1 inc) *6 (18)
R4. (2 sc, 1 inc)*6 (24)
R5. 24 sc
R6. (2 sc, 1 dec)*6 (18)
Fasten off, , leaving a long yarn tail.
Pants Bunny:
Starting with yellow color
Ch 30. First connect the loop to create the ring.
R1 to 3. 30 sc
Do not cut the yarn after you have finished the second part, because we willcontinue connecting the part right after.
R4. Continuing part 2. Ch 1. Start in the same st. 3 sc. Ch 3, joined part 1 with single crochet.Contuning part 1, 30
sc, sc in the next 3 ch. more than the part 2, 27 sc, sl st in the first st
R5. Ch 1. 3 sc, sc in the next 3 ch, 60 sc, sl st in the first st (66)
R6 to 7. Ch 1. 66 sc, sl st in the first st.
R8. Ch 1. (9 sc,1 dec)*6, sl st in the first st. (60)
R9. Ch 1. 4 sc, 1 dec, (8 sc, 1 dec)*5, 4 sc, sl st in the first s.t (54)
R10. Ch 1. (7 sc, 1 dec)*6, sl st in the first st. (48)
R11. Ch 1. 3 sc,1 dec, (6 sc,1 dec)*5, 3 sc, sl st in the first st. (48)
R12. Ch 65, turn. Starting 2.chain from hook. 64 sc, sl st in the same sc.
Fasten off.